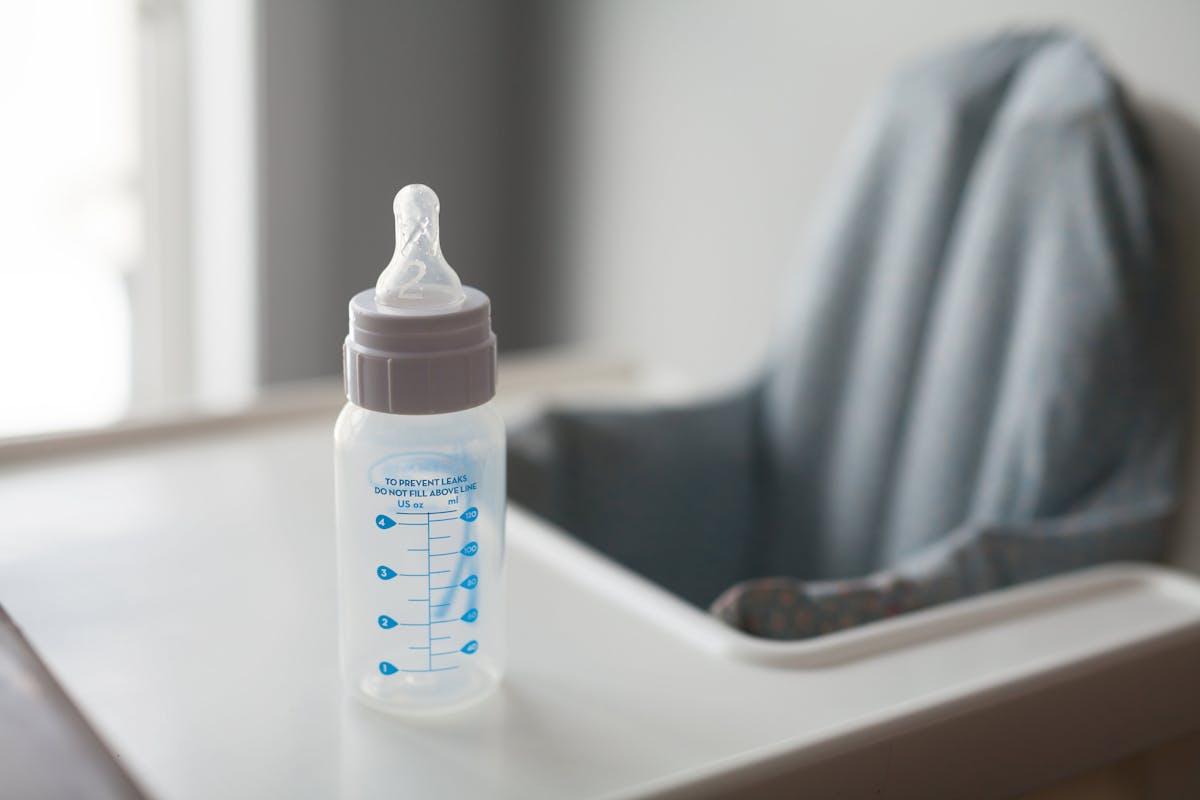
Bottle Body
Capacity, shape, material, opening width, and measurement markings can differ from one design to another. Choose a format that suits the way the bottle will be prepared, held, cleaned, stored, and packed.
Main ContainerAvelumi Feeding Guide
A clear, considered guide to the bottle pieces, routines, and everyday details that make feeding feel more organized.
Baby bottles may look simple, but the daily experience often involves several small decisions: bottle shape, nipple style, cleaning, assembly, warming, packing, and knowing which pieces belong together. This guide organizes those details into an easy system so parents can understand the role of each part without turning a practical routine into something complicated.
Understand the pieces
A bottle works as a group of compatible parts, not just as one container.
Keeping each piece with its intended bottle system can make assembly more predictable. Before combining replacement parts or accessories, check the product information carefully so the bottle body, nipple, collar, cap, and any additional components are designed to work together.
Capacity, shape, material, opening width, and measurement markings can differ from one design to another. Choose a format that suits the way the bottle will be prepared, held, cleaned, stored, and packed.
Main ContainerNipple styles can differ in shape, material, and flow designation. Check the specific product information and use the option intended for the bottle system and feeding routine.
Feeding InterfaceThe collar holds compatible nipple components in place. Correct positioning and assembly matter, so follow the instructions supplied with the bottle before first use and after reassembly.
Secure AssemblyWhen included with the bottle design, a cap can help cover the nipple between uses. Keep caps clean and store them with the matching bottle parts so they are easy to find.
Between Uses
Everyday feeding
The most useful bottle setup is often the one that is easiest to repeat. Keep clean parts together, store matching components as a set, and designate one area for assembly so the pieces you need are easy to locate during the day.
Bottle routines vary from family to family. Some parents prepare one bottle at a time, while others organize multiple clean bottles for the day. Whichever approach fits your routine, follow the individual bottle instructions and appropriate feeding guidance for preparation, handling, storage, and temperature.
Keep bottle bodies, nipples, collars, and caps grouped by compatible system.
Look over feeding components regularly and follow the manufacturer's replacement guidance when a part shows wear or damage.
Reassemble the bottle according to the product directions rather than relying on assumptions from another bottle design.
After washing and drying, return matching parts to the same storage area so the next setup begins organized.
Choose by routine
A practical bottle choice starts with the way it will actually be used. Consider where bottles are prepared, how often they travel, what cleaning setup is available, and which related feeding products need to work alongside them.
For bottles used primarily at home, focus on a system that fits the available washing, drying, storage, and warming setup.
For bottles that frequently travel, think about how easily the bottle fits into the diaper bag and how clean components will be separated from used items.
If the same bottle system moves between home and outings, consistency can help keep the collection easier to organize.
Before you choose
Product specifications can help you compare bottles more clearly than appearance alone.
Review the stated bottle capacity and measurement information on the individual product page. Choose according to the intended feeding routine rather than assuming all bottle sizes serve the same purpose.
Bottle bodies and accessories may use different materials. Read the product description for material details, care instructions, temperature limitations, and any specific handling guidance.
Not every nipple or collar is interchangeable across bottle systems. Confirm compatibility before purchasing replacement feeding components.
Bottle opening styles can influence filling, cleaning, assembly, and accessory compatibility. Compare the dimensions provided for the exact bottle.
Follow the product instructions for washing, drying, sanitizing where applicable, and care of individual components. Do not assume one cleaning method is suitable for every material.
If the bottle will be used with a bottle warmer, review both product descriptions for size and material compatibility and follow the warmer instructions for operation.
Compare bottle dimensions with the compartments in the diaper bag or organizer you use most often, especially if bottles will routinely travel.
Before choosing a bottle system, review whether compatible replacement components are identified for that exact design and keep part information for future reference.
Between feeds
A bottle routine becomes easier to manage when there is a clear transition from used, to cleaned, to dry, to ready. Separate these stages so bottle parts do not become mixed together while moving through the day.
Always follow the manufacturer's cleaning and care instructions for the exact bottle and its components. When infant-feeding preparation or storage guidance is needed, use current guidance from appropriate health professionals or public-health authorities.
Keep used pieces distinct from clean, ready-to-use bottle components.
Follow the exact bottle care directions for washing each component.
Allow components to dry according to the applicable care guidance before storage or reassembly.
Return matching parts to their bottle system so the next setup starts organized.
Daily workflow
This sequence is an organizational framework, not a replacement for bottle-specific instructions or professional feeding guidance. Use it to keep the physical bottle system easier to manage throughout the day.
Bring together the bottle body, compatible nipple, collar, cap, and any other components specified for that bottle. Keeping complete sets together reduces unnecessary searching during preparation.
Look over the bottle and feeding pieces before use. If a component appears damaged, unusually worn, or otherwise unsuitable, follow the manufacturer's guidance for discontinuing use or replacing the part.
Follow the appropriate feeding guidance for what is being placed in the bottle, along with any preparation, handling, storage, and timing directions that apply to your situation.
If a bottle warmer is part of the routine, follow the warmer instructions and confirm bottle compatibility. Use appropriate feeding guidance for checking temperature before feeding.
After use, keep items waiting to be cleaned separate from clean bottle parts. A dedicated container or defined area can make the transition easier to manage.
Once the components have been cleaned and dried according to their instructions, return matching parts to the same location so the next feeding routine begins with an organized set.
Practical notes
The bottle itself is only one part of the routine. These small habits can help keep product information, compatible pieces, and day-to-day organization easier to manage.
Save the bottle care directions and any compatibility information so they can be checked again when replacement parts are needed.
Avoid mixing similar-looking parts unless the product information specifically confirms they are compatible.
Give each stage of the bottle routine a defined place so ready-to-use pieces stay easy to identify.
Follow manufacturer guidance for checking feeding components and replacing parts when appropriate.
Bottle size, shape, and material may affect compatibility with warming equipment. Review both products before combining them.
When bottles leave home, organize the diaper bag so clean components, feeding items, and used pieces have clearly separated places.
Avelumi service
Avelumi keeps the store experience straightforward with simple shipping, delivery, support, and return standards for customers shopping through the U.S. storefront.
Customer support is available around the clock for store, product, order, delivery, and policy questions.
All products sold through Avelumi include free shipping.
The standard delivery timeframe for Avelumi orders is 3–5 business days.
Free returns and exchanges are available within 30 days in accordance with the applicable store return conditions.
Bottle questions
Every question remains closed until selected, keeping the page visually calm while allowing shoppers to open only the information they need.
Review the individual product page for bottle capacity, dimensions, materials, included parts, nipple information, cleaning directions, compatibility, and any care requirements. The best choice depends on the feeding routine and the products the bottle needs to work alongside.
Do not assume that similar-looking nipples, collars, caps, or other components are interchangeable. Confirm compatibility using the product information or manufacturer instructions before combining parts.
Cleaning methods can vary by material and bottle design. Follow the directions supplied with the exact product, including instructions for washing, drying, sanitizing where applicable, and caring for individual components.
Bottle warmer compatibility varies. Review the warmer specifications and the bottle product information for supported bottle dimensions, materials, setup directions, and operating instructions before use.
Give clean feeding items a dedicated compartment, keep protective caps or related pieces with the matching bottle system, and create a separate area for anything that needs cleaning after use. Reset the bag after returning home.
No. Avelumi provides free shipping on all products sold through the store.
The standard Avelumi delivery timeframe is 3–5 business days.
Avelumi offers free returns and exchanges within 30 days, subject to the applicable store return and exchange conditions.
Yes. Avelumi provides 24/7 customer support for product, store, order, shipping, delivery, return, and policy questions.
The current Avelumi email promotion is Sign Up & Save 16%.
Avelumi email list
Join the Avelumi email list for the current signup offer and occasional store updates.